Interior Recirculation Cabin Filter Replacement
Location
Behind the front passenger footwell panel.
Tools Needed
T20 Torx screwdriver and trim removal tool.
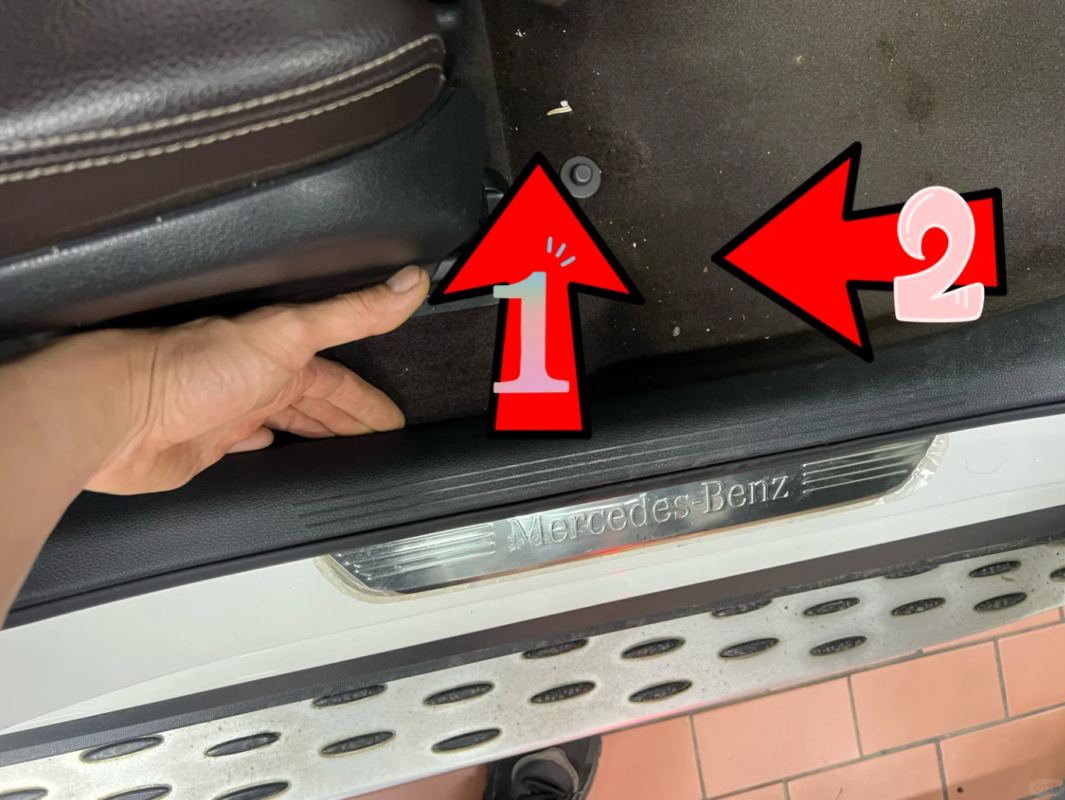
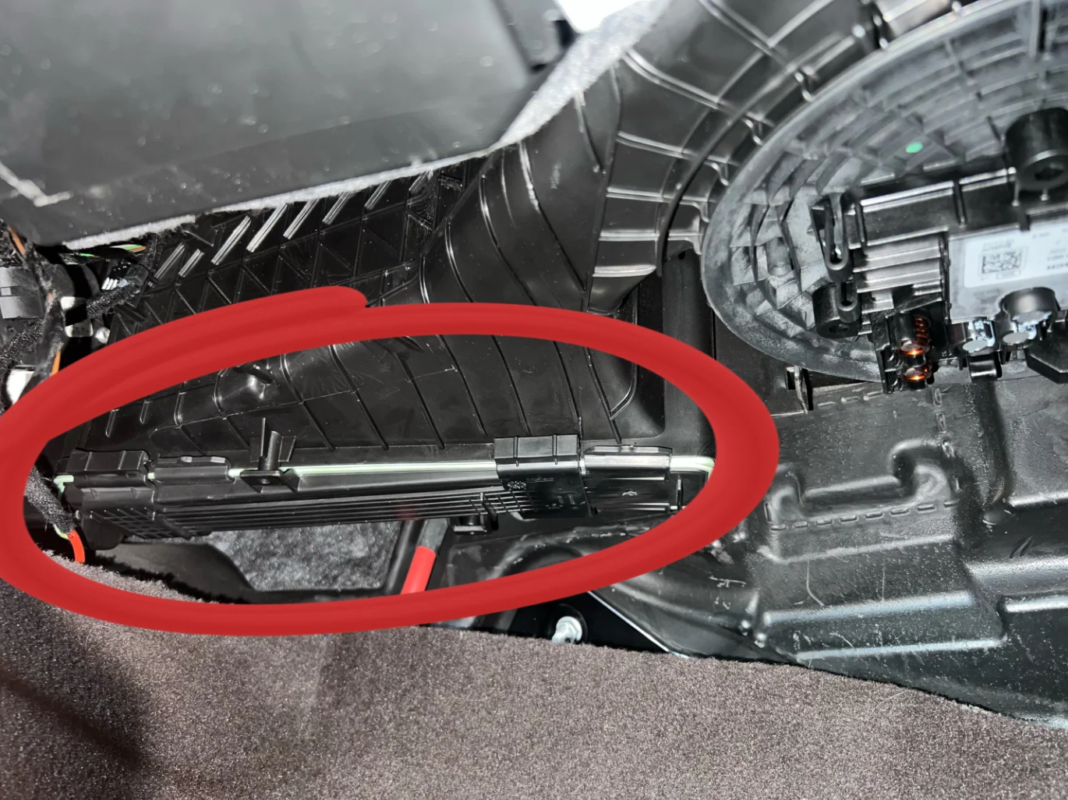
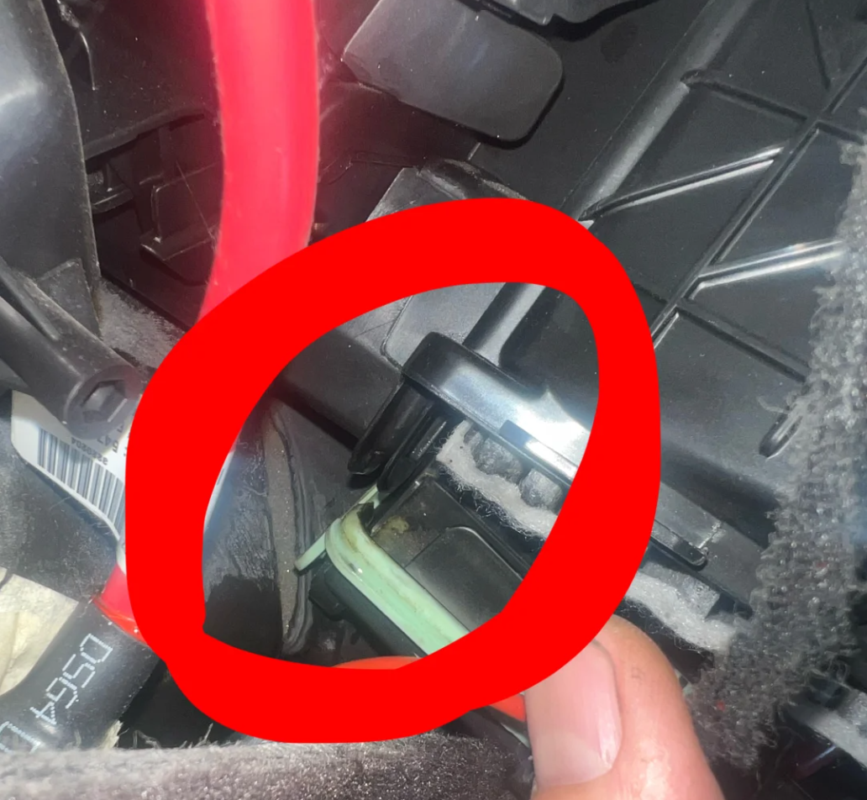
- Open the front passenger door. As shown in Image 1, carefully pry off the footwell trim panel with a trim tool. Work gently around the edges to avoid damaging the clips.
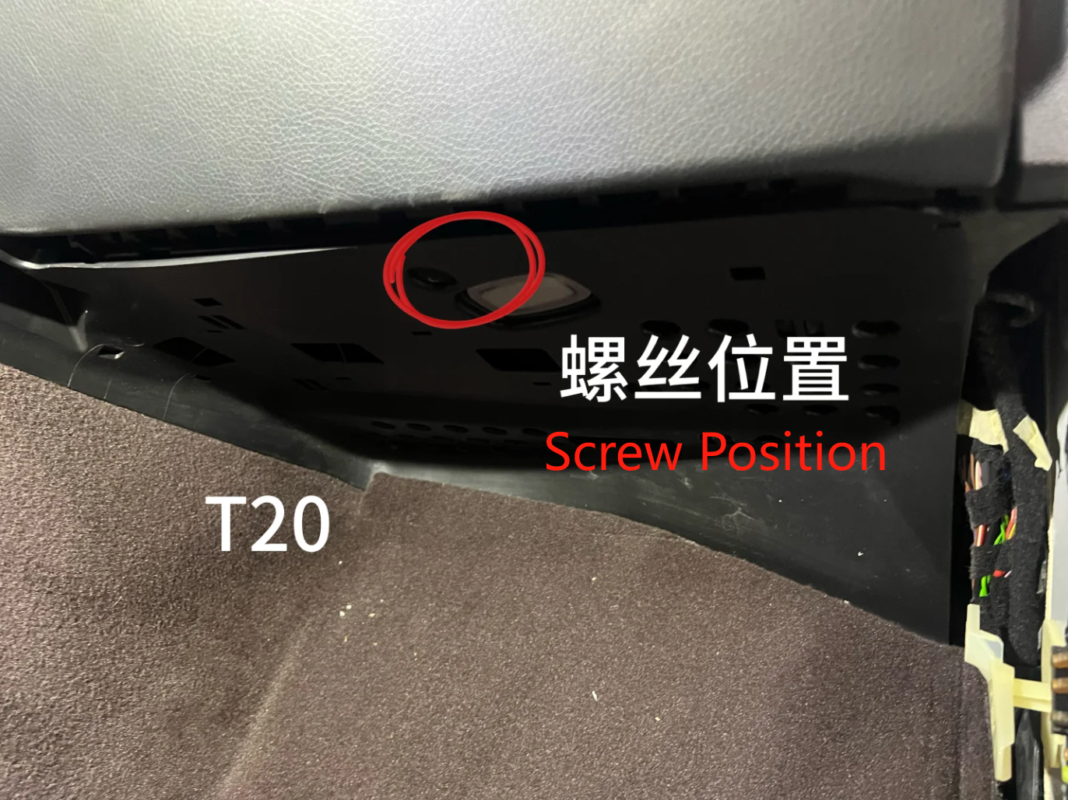
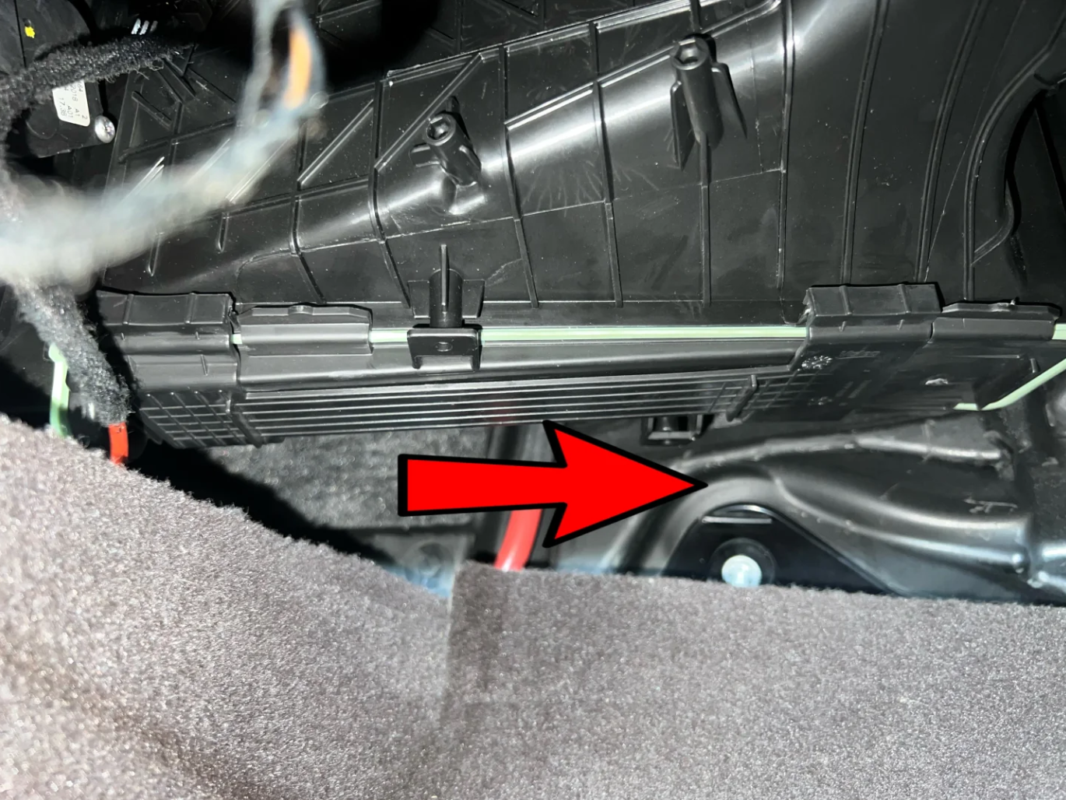
- Remove the lower trim screw. Lie down and locate the screw shown in Image 2. Use a T20 Torx screwdriver to remove the screw securing the lower trim panel.
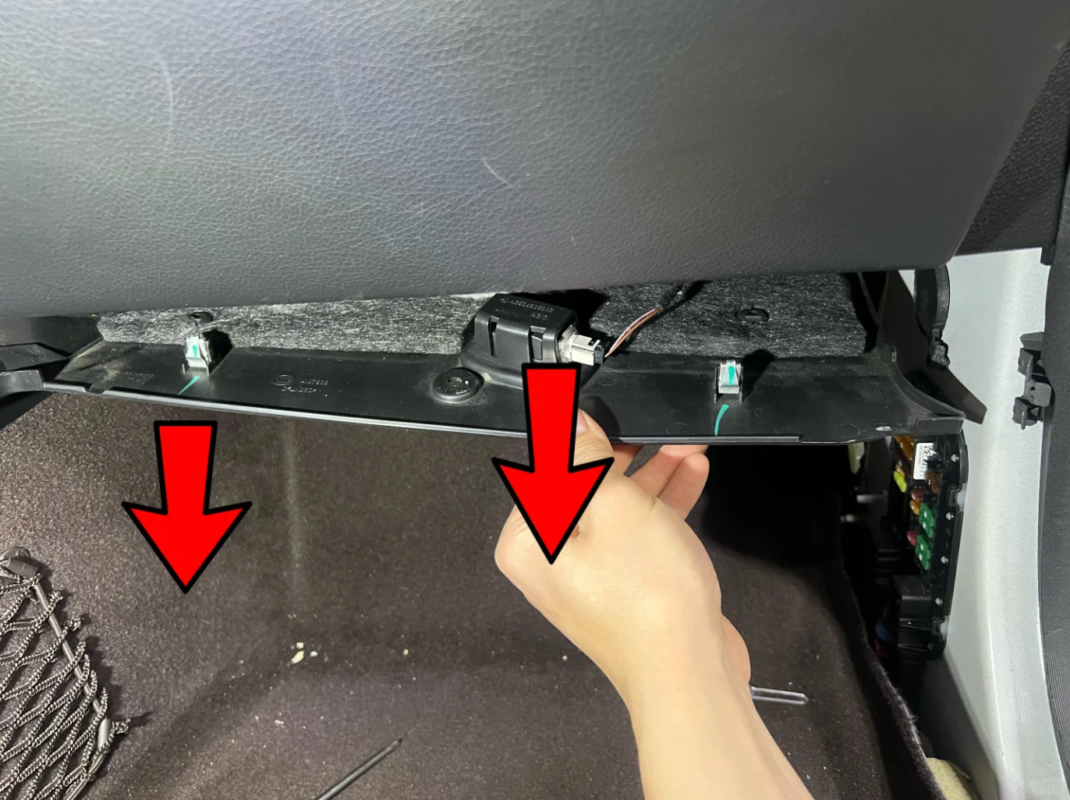
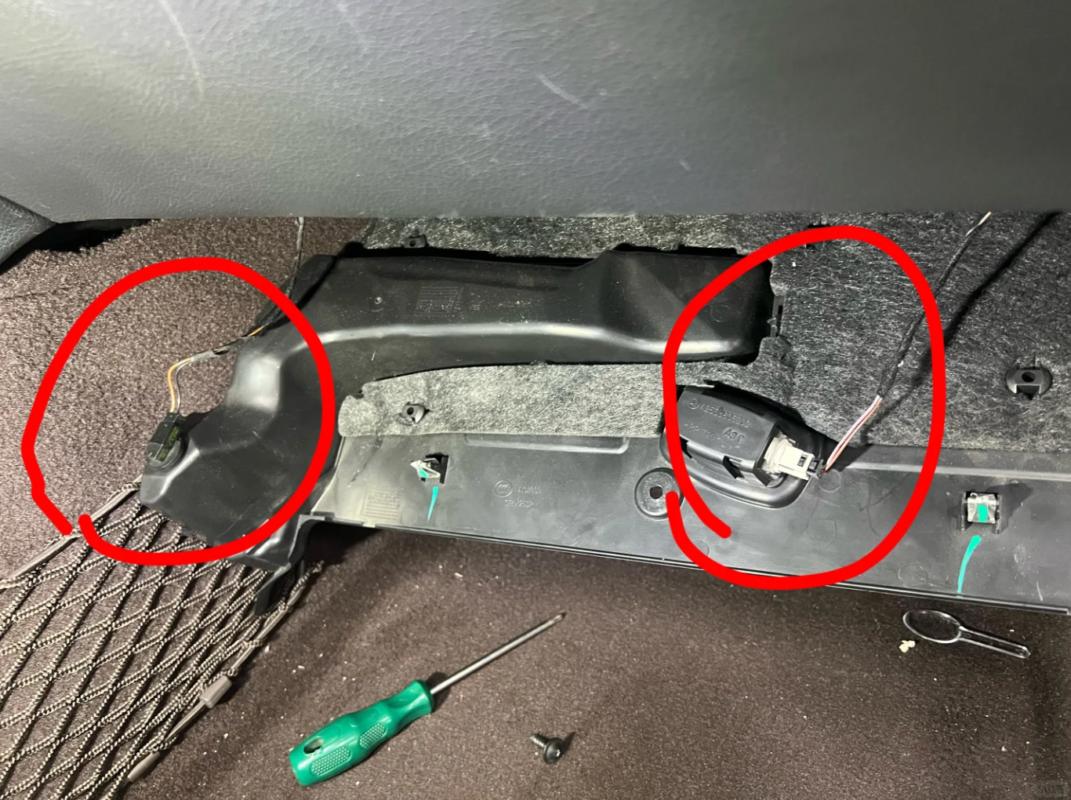
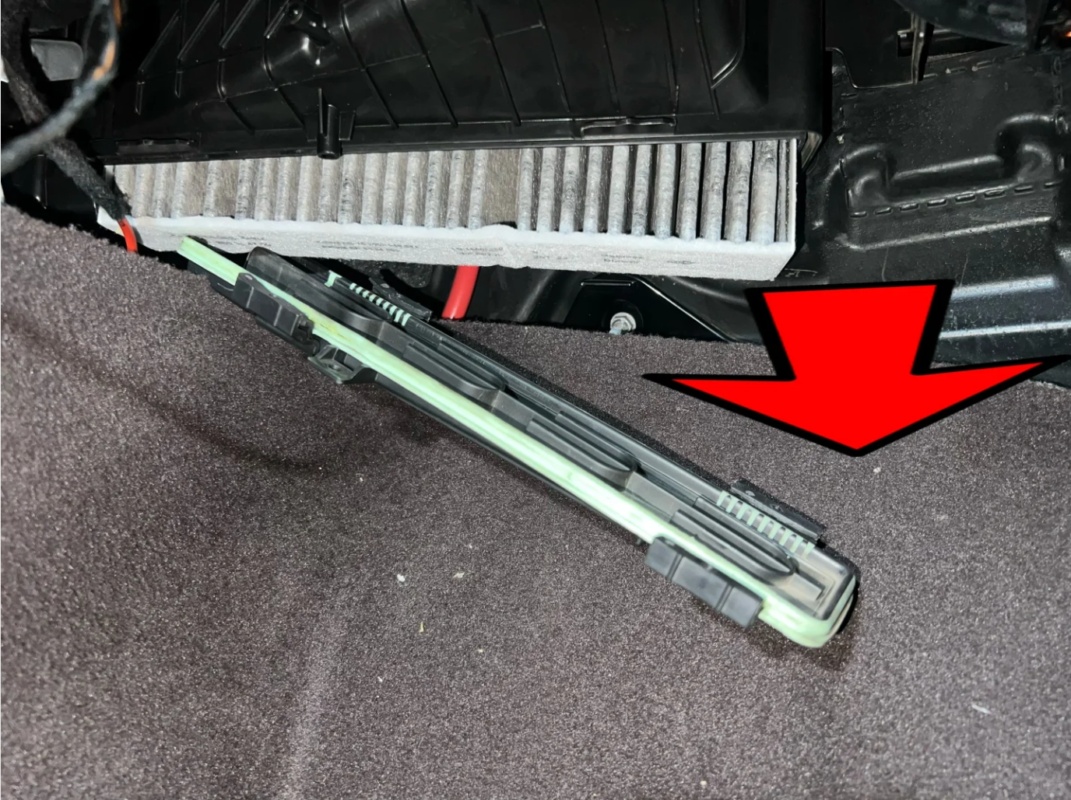
- Lower the footwell panel. Refer to Image 3 and gently pull down the footwell panel. There are two connectors in the area shown in Image 4; unplug them to make access easier.
- Open the filter housing. You will now see the cabin filter cover, shown in Image 5. Slide the cover to the right to open the filter housing.
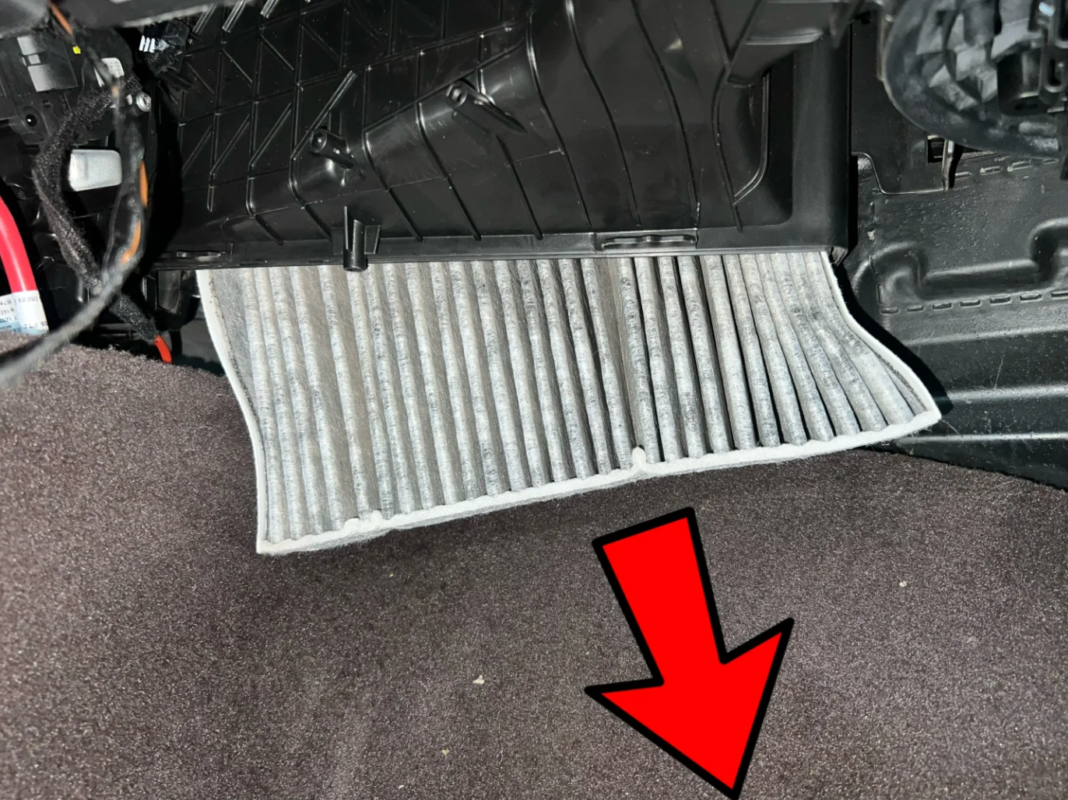
- Remove the old filter. As shown in Image 6, pull the old cabin filter downward in the direction of the arrow. Be careful of falling dust and note the filter orientation.
- Insert the new filter correctly. Make sure the new filter is aligned and inserted into the slot marked in Image 9. If the filter is not aligned, the cover may not close correctly.
- Reassemble the panel. Reconnect the plugs and reinstall the trim panel in reverse order. The recirculation cabin filter replacement is now complete.
Tip: A high-quality activated carbon filter can help filter PM2.5 particles, pollen, and odors more effectively.
Passenger Footwell Image Reference
Use the image sequence below to match each removal point before pulling the panel or filter by hand.
External Fresh Air Cabin Filter Replacement
Location
Engine bay, near the windshield.
Tools Required
No special tools are needed.
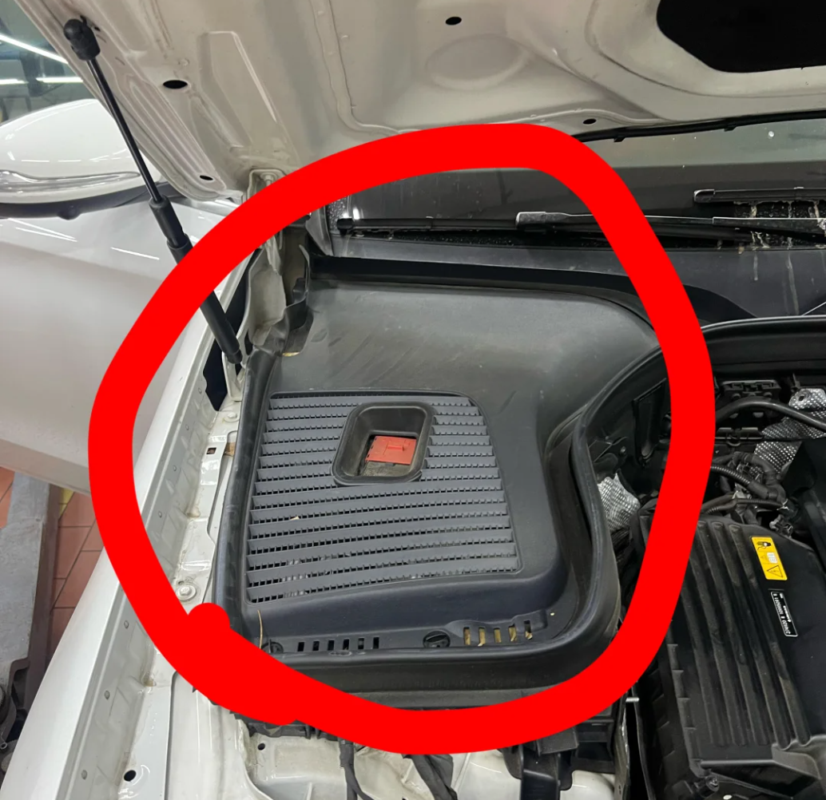
- Open the hood. As shown in Image 10, locate the plastic cover near the windshield wiper area.
- Release the fasteners. Image 11 shows two twist-lock fasteners on the cover. Turn them 90° clockwise and pull them up. The fasteners remain attached to the cover.
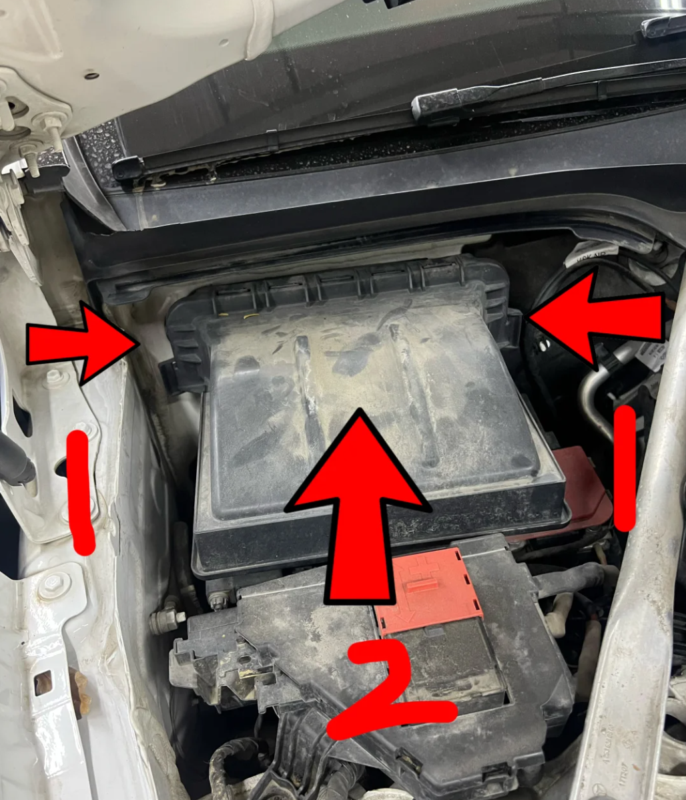
- Unlock the clips. Refer to Image 12. Gently pry open the two clips by hand, then lift the A/C fresh air intake panel upward.
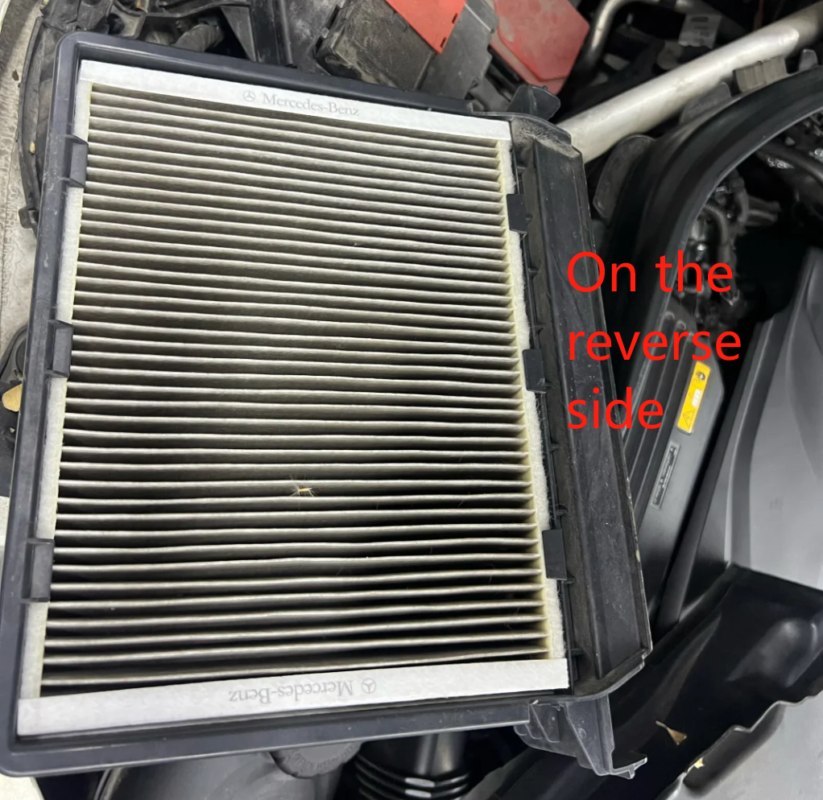
- Replace the external filter. Flip over the intake panel to reveal the external cabin filter, as shown in Image 13. Remove the old filter and install the new one.
- Reinstall the intake panel. Lock the clips, place the cover back in position, and tighten the fasteners. The external cabin filter replacement is now complete.
Note: The external fresh air cabin filter is designed to block outside dust, leaves, insects, and airborne pollutants before they enter the cabin ventilation system.
Engine Bay Image Reference
These images show the windshield-area cover, fasteners, clips, and filter position for the external fresh air cabin filter.
How Often Should You Replace Your Car’s Cabin Air Filter?
Replace the cabin air filter every 6 months or after driving about 10,000 kilometers, or 6,000 miles. If you often drive in heavy traffic, polluted areas, or dusty roads, change the filter more often. This keeps the air cleaner and helps your A/C system work better for longer.
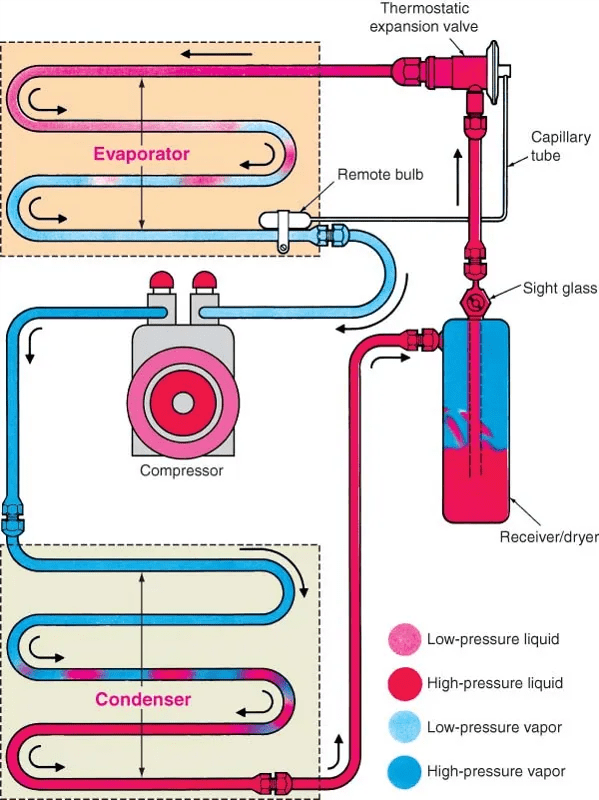
If you still notice an unpleasant odor after changing the filter, the problem may come from the evaporator or A/C ducts. These parts can hold mold or leftover smells, so an A/C system disinfectant or cleaner may be needed. If airflow drops sharply, a clogged filter is likely blocking the air, and replacement usually restores airflow.
For most vehicles, cabin filter replacement is a relatively simple task. With a quality OEM or aftermarket filter and basic tools, many car owners can follow a tutorial and perform the replacement themselves, saving time and money.
A Simple Service That Improves Cabin Comfort
Replacing your cabin air filter makes the car more comfortable and helps the A/C system last longer. If you own a Mercedes GLC, C-Class, or E-Class, you can complete this service yourself by following the passenger footwell and engine bay steps carefully.
Before you begin, review the image references, prepare the correct filter, and work gently around plastic clips and connectors. A careful installation helps keep airflow strong, odors under control, and the cabin environment cleaner.